Thursday, May 31, 2012

Thankful Thursday - Fava Beans

Last weekend, I was lucky enough to visit the farmer's market with my family.  When I go to school in New York, I always forget the great variety of fruits and vegetables that really exist.  The majority of my food shopping is done in mainstream grocery stores, which offer your basics.  Among the conventional produce will sit the depressed-looking organic fruits, typically older and pricier than the conventional, as though they had an inferiority complex for being sustainably grown.  Inevitably, I either buy the conventional or fewer of the organic, put off by the higher price (college student paying tuition, thanks) and the clear signs of a tired, bumpy truck ride across many states.  The situation is such that whenever I do manage to visit a farmer's market, I am thoroughly grateful.  

Among our purchases that day were strawberries, a wonderful sheep's milk cheese, vegetables and these lovely, huge fava beans.  I had never had them fresh before.  They're called broad beans sometimes, which is the label on the packages of fried fava beans you can find in Oriental markets.  They're a tasty snack, but my mum calls them yeet hay, or "hot air."  Basically, it means that they're dry and salty, very yang in the scheme of things, and generally not great for you, nutritionally speaking.  However, they're crunchy, salty, substantial, and delicious.  These beans, however, I bought at the farmer's market to shell and cook by myself.  As you can see, the inside is a soft fuzz, caressing each spring green bean gently and firmly.

They were a lot of fun to open, but then, we had bought less than a pound.

I liked the crisp snap of the bean as it broke apart, reluctantly yielding its treasure.  The beans, after all, are seeds, the intended next generation of the fava bean plant.  I boiled water with a healthy pinch of salt, then added the shelled beans and let them cook for 5 minutes.  I then fished them out of the pot and tossed them into a hot pan with some salted butter.  The salted butter definitely added to the flavor, which was mild.  The beans were very soft, and if I cook them again, I might reduce cooking time to 3 
minutes.  In the end, though, I can clearly declare that I do like fava beans :)

Saturday, May 26, 2012

Inspiration - Peppermint-Stracciatella Ice Cream

Although this post really follows yesterday's, it was originally inspired by an amazing cup of gelato from New York City. I now regret not taking a photo of this wonderful scoop of heaven (in two flavors!), but as it was, I was running to catch a train after an interesting day in itself.

Peppermint-Stracciatella Ice Cream adapted from David Lebovitz 
Makes somewhat less than a quart (especially if people keep tasting...!)

Ingredients
1 cup whole milk (I used 2% since that's what I keep on hand)
¾ cup sugar
Pinch teaspoon salt
3 egg yolks
2 cups heavy whipping cream
1 teaspoon vanilla extract
½ teaspoon peppermint extract
2 ounces bittersweet chocolate, melted

Equipment
1 small saucepan
1 rubber spatula
2-cup liquid measure
¼ cup dry measure 
1 whisk (for custard)

Directions

1. Mix the milk, sugar and salt on the stove and heat until steaming.  Meanwhile, in the 2-cup liquid measure, whisk together the egg yolks.  Pour a little of the hot milk into the yolks, stirring constantly (I like to dip the 1/4 cup measure into the milk and use it as a scoop).  Pour about another 1/4 cup milk or so into the yolks, then pour all the yolks and milk back into the saucepan.  Cook, stirring constantly, for another 10 minutes or so, until the mixture stops swirling within 2 seconds of pulling out the whisk or spatula.

2. Gently pour the custard into the cream and let cool.  Add the vanilla and peppermint extracts, then cover and cool in the refrigerator overnight.

3.  The next day, either churn in an ice cream maker, or put into the freezer, stirring once every half hour.  When the ice cream is almost firm, drizzle the chocolate in slowly and stir until frozen.  Enjoy!

Friday, May 25, 2012

Tried and True - Yogurt Cake

It's been a while!  If you'll forgive me, it's been an insane past few weeks.  From a bioelectricity final three Thursdays ago, an Orientation, packing up my room and preparing to volunteer at Commencement two Thursdays ago and getting two wisdom teeth extracted yesterday, this blog has slipped to the bottom of my list even as I finish up another year of school.  Luckily, I've finally managed to get most things in order and will be able to update more regularly and catch up on every most things, including a recipe using some of the homemade yogurt I wrote about, um, quite a while back.

This recipe is borrowed from Clotilde of Chocolate and Zucchini, the author of one of my favorite blogs.  She lives in France and spent two years in California as a software engineer (I have a soft spot for STEM people, particularly engineers).  Actually, I just checked her blog, and she announced the birth of her first son!  I admire her very much.  And her cake recipes, especially this one :)

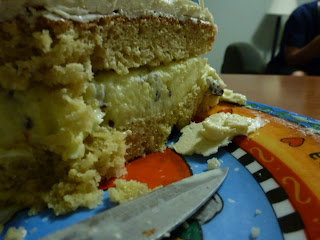
 Although the original cake that I made with batch of yogurt I made in April was actually coconut, I decided to work with the recipe again for my boyfriend's birthday.  He lives in New York and I in California, so I will miss his real birthday.  Instead, I chose to bake him an ice cream cake to celebrate with some of this friends the day before Commencement (oh, yes, that same Thursday as packing up, etc...).  He's fond of vanilla more than chocolate (gasp!) but loves almond, so the components were a peppermint ice cream with stracciatella-style chocolate streaks, vanilla-peppermint Swiss buttercream and this vanilla-almond yogurt cake. If you'll forgive me further, I promise the ice cream recipe tomorrow.  I'm still working on this whole, oh, West Coast timing thing.

And I also learned a new method of neat piping to go with this cake!
Basically, I piped this in chocolate, backwards on a piece of parchment paper.
I put this in the fridge to harden, then quickly flipped it over onto the frozen buttercream.
As you can see, it still needs a little work.
Sadly, it's already a heck of a lot neater than it usually is :P


Almond-Vanilla Yogurt Cake adapted from Chocolate and Zucchini 
Makes 1 9" round very domed cake

Ingredients
2 eggs
1 cup homemade yogurt (store-bought works, too, of course)
1 cup firmly packed dark brown sugar
cup melted butter or vegetable oil
1 tablespoon vanilla extract
½ teaspoon almond extract
2 cups all-purpose flour
1½ teaspoons baking powder
½ teaspoon baking soda
¼ teaspoon salt

Equipment
2-cup liquid measure 
1 large mixing bowl
1 medium mixing bowl (optional, I just used the 2-cup liquid measure)
¼ teaspoon measure
½ teaspoon measure
1 teaspoon measure
1 tablespoon measure 
1 cup dry measure
1 rubber spatula  
1 whisk for dry ingredients
1 9" round cake pan
Parchment circle to line the bottom
Butter to grease the sides and a little for the bottom

Directions

1. Preheat the oven to 350F.  Put a little butter on the bottom on the cake pan, then line with parchment circle.  Lightly grease the sides of the pan. 

2. In the medium mixing bowl or the 2-cup liquid measure, mix the eggs, yogurt, sugar, butter or oil, vanilla and almond extract.

3. In the large mixing bowl, whisk together the flour, baking powder, baking soda and salt.  Add the wet ingredients and gently fold until there are no streaks of flour left.

4. Pour the batter into the pan and tap a few times to release some of the large bubbles and even out the batter.  Bake at 350F for about 30-35 minutes, or until a toothpick comes out clean.  Just a tip, when leveling the cake, the top makes a crisp, soft, moist and delicious snack.  Enjoy! 

Some assembly required, but I'm told it was worth it :)

Friday, May 4, 2012

Thankful Thursday - Strawberries

I know, I know, almost 24 hours overdue *hangs head in shame*  And this post even regards one of my very favorite things to eat on this planet, strawberries!  This past Wednesday, my boyfriend and I attended the annual Strawberry Festival at our school, where for $8.45 (if you buy a ticket ahead of time), you get a sample of 9 different food stations, including something called "Strawberries To Go," which is a pound of fresh strawberries.  Considering that strawberries are around $4 a pound here in New York (often shipped from California!), well, lunch + a pound of strawberries was a bargain.

What to do with these sweet strawberries?  Considering that they're still not really in season, my favorite way to enjoy them is with things.  You know, when I can resist eating them anyway, which is not often...  Well, with the ones I had left, I baked some into scones (including some quite delightful strawberry mint chocolate ones), but the scone recipe didn't quite turn out the way I expected.  I'll have to mess with it some more until I'm happy.  The strawberry tarts, too, which were pretty good, but since I lacked milk, had no custard base...  After I share the second yogurt recipe I've been meaning to share since the first week of April (!)...

One thing that did turn out lovely, however, was mint chocolate-dipped strawberries.  The only time-consuming part about them is that they need to both wash and dry, since the chocolate won't stick if the strawberries are wet.  Also, they do need to cool and harden so the chocolate develops a lightly crackly shell, even without tempering.  So simple, they don't even need a recipe.  Although, a sheet of parchment paper to set the berries to dry might help :)