Sunday, August 28, 2011

Fun with Friends - Devilishly Moist Chocolate Cake

I love to bake and I love to be working with people, but usually those two don't mix.  I tend to be very precise in my measurements and finicky in technique, something many others aren't.  It annoys me when people make simple mistakes, such as packing flour into a measuring cup, or stirring cake batter too much.  I prefer a robust recipe that can take error when I bake with others.  On the other hand, sometimes it can be fun to try a new recipe with a friend.  On this occasion, I was lucky enough to be hanging out with a friend I haven't seen in a while.  Passionate about helping those less fortunate, her major is 3rd World Studies.  Because she will be taking a year to help with a school in Africa and then studying abroad there, I was lucky to be able to see her before she left.  I was doubly fortunate in finding out that she is great at helping.  I measured and she whisked until the cake came together, and the baking went off without a hitch.

This cake rather resembles dense, rich pudding rather than a light and fluffy cake.  I needed a very sharp knife to slice through the layers of cake, and our family's usual chef's knife basically reduced the cake to a nice, chewy pudding.  I liked it, although I can see how on some occasions it can be too rich.  It stores well at room temperature (wrapped in foil, per instructions from The Cake Book by Tish Boyle), but becomes even denser and richer refrigerated.  It reminds me of a chewy brownie, actually, somewhat similar to the Sour Cream Chocolate Cake recipe but denser.  Although my friend had to leave before we made the frosting, I took upon this endeavor and later delivered the cake to her house.  The next post will cover the recipe for the buttercream.

Devilishly Moist Chocolate Cake from The Cake Book by Tish Boyle
Makes 1 9" round cake

Ingredients
1 cups all-purpose flour
¾ cup cocoa powder
1¼ teaspoons baking powder
½ teaspoon baking soda
¼ teaspoon salt
1 cups sugar
cup oil (safflower or other neutral vegetable oil, I used the inexpensive bulk olive oil)
2 large eggs
cup whole milk (yup, still no whole milk, so I used 1%)
2 teaspoons vanilla extract
1 cup boiling water

Equipment
1 large mixing bowl
1 balloon whisk
2-cup liquid measure
1 cup dry measure
⅓ cup dry measure
¼ cup dry measure
1 teaspoon measure
½ teaspoon measure
¼ teaspoon measure
1 9" round springform pan (or 9" round cake pan, 3" high sides)
Foil to wrap around the springform pan if using (batter is very liquidy)
Butter and flour for rendering the pan nonstick

Directions

1. Preheat the oven and tightly wrap the outside of the springform pan with foil to prevent leakage.  Butter the inside of the pan, then dust with flour.

2. In the large bowl, whisk together the flour, cocoa powder, baking powder, baking soda, salt and sugar.  Add the oil and whisk until very crumbly.

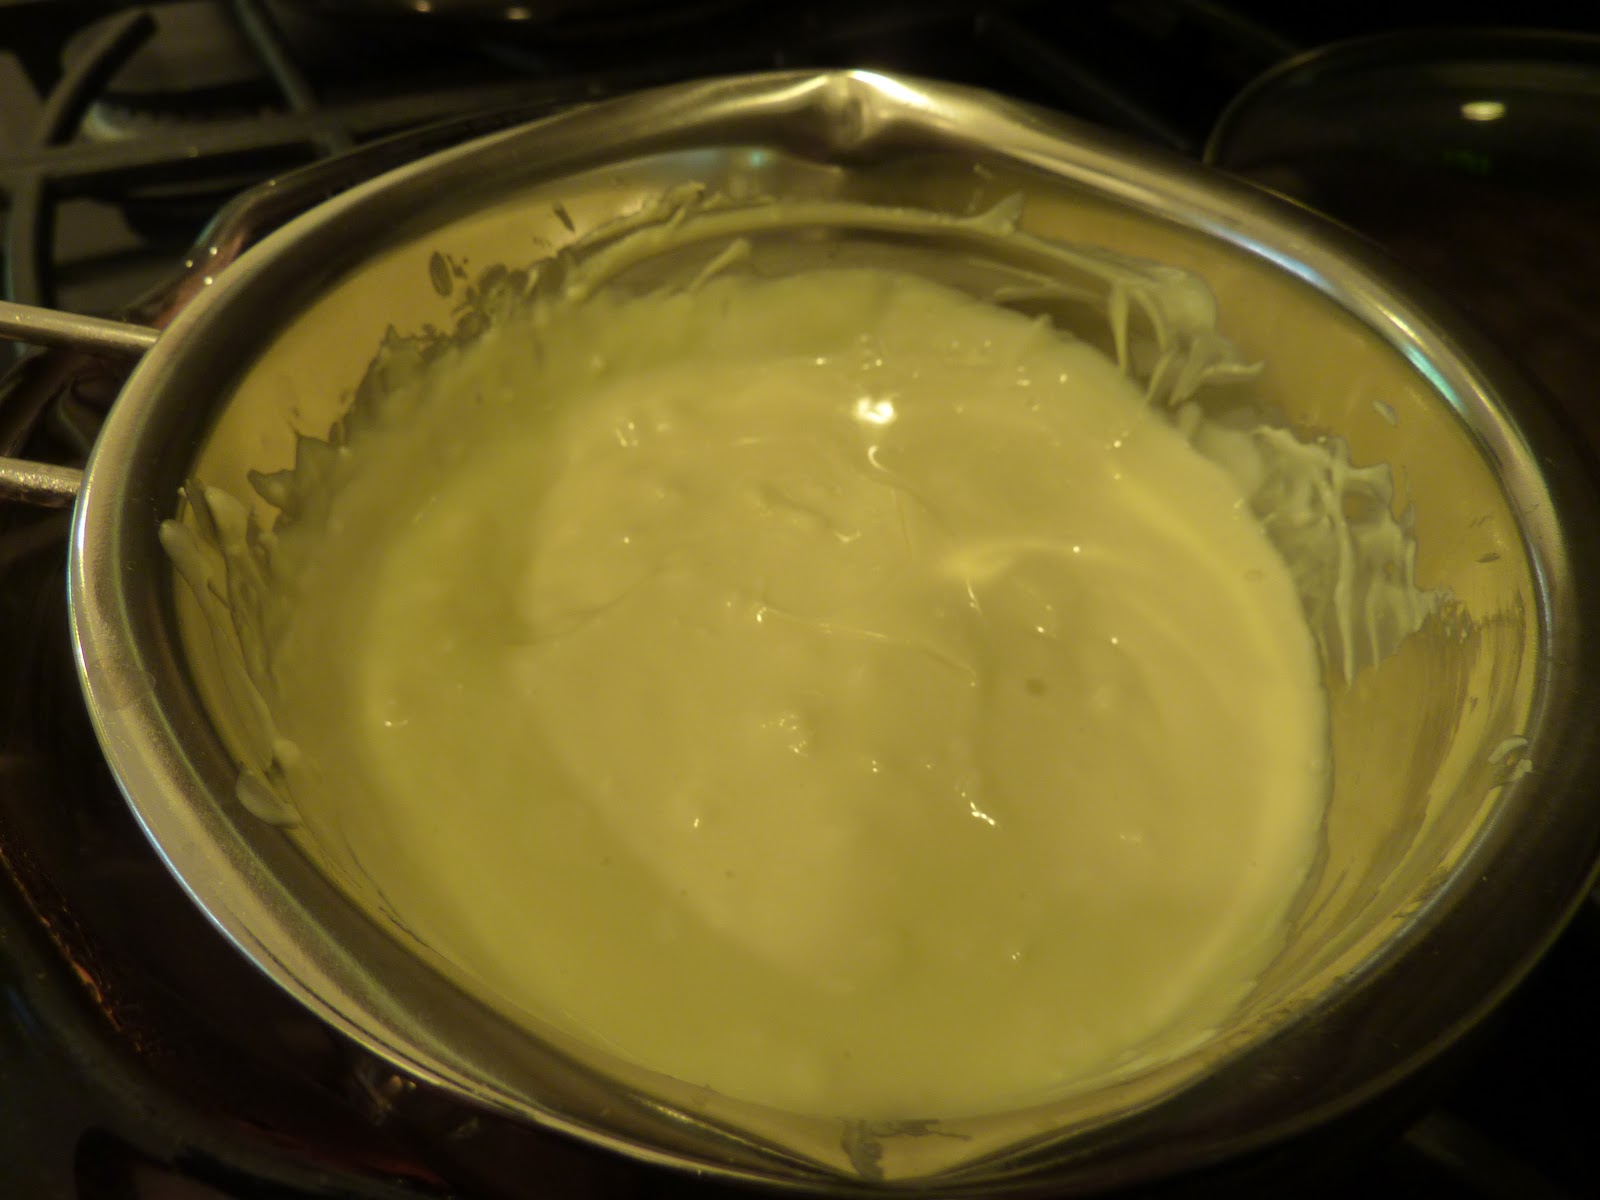
3. Beat the eggs in the measuring cup and pour into the chocolate cake mixture.  Pour in the milk and vanilla, then whisk until it becomes batter.  Add the hot water and whisk together.  The batter will be very wet, about the consistency of thin, creamy soup.

My lovely friend, about to pour the batter :)

4. Pour the batter into the prepared pan and bake for about 45-55 minutes, until a toothpick stuck in the center comes out clean.  Our cake came out perfectly after about 55 minutes.  Enjoy!  


I made another one for my family, since my brother kept looking enviously at the one in the fridge...


Thursday, August 25, 2011

Guilty Pleasure - White Chocolate Raspberry Cheesecake

Making it, not eating it.  Sadly, my mum long ago forbade me to make cheesecake as there were few recipes that made a reasonably-sized cake.  With all the obsession about being overweight and needing to lose a few pounds, a giant cake that weighed more than a kilo had no home in our freezer.  No matter how beautiful or how long it took to make or, especially, how delicious it was, no space in the freezer.

Then my lovely boyfriend came to visit me, flying in from all the way across the country.

Sorry about the bad indoor lighting!  I'm still working on correcting for the yellow light.

When a guest comes, there are exceptions and I am one happy baker.  I am allowed hours in the kitchen, giant messes all over counters and floors (as long as it's cleaned up, and the pup doesn't lick up any chocolate), any and all available utensils in the house and any ingredient I can get my hands on.  This one required several days of ingredient collection, half a day of baking and a full day of refrigeration as well as a severe dose of patience and self-control, but in the end, I think it was worth it.  

If the 7 Deadly Sins were in food form, cheesecake fills the position of Lust.  The batter was smooth and creamy in addition to being sweet, tangy and delicious.  Once it was baked and chilled, the luscious batter transformed into a soft and silky custard punctuated with tart raspberries atop a sweet vanilla sponge cake.  My only change would be to strain the raspberries before using.  Both my dad and boyfriend noticed that the seeds were crunchy interruptions in an otherwise perfect cake, miniature cracks and all.

Isn't it pretty?  The top browned too much, miniature cracks formed over the entire top, for hours I feared a soggy sponge crust, raspberry seeds poked into every bite, my improvised water bath failed and I could barely get the springform sides off without severely denting the cake.  And yet, I feel so very fulfilled.

White Chocolate Raspberry Cheesecake 
from Junior's Cheesecake Cookbook by Alan Rosen and Beth Allen

Sponge Cake

Ingredients
cup sifted cake flour
¾ teaspoon baking powder
Pinch of salt
2 extra-large eggs, separated
cup sugar
1 teaspoon vanilla extract
3 drops almond extract
¼ teaspoon cream of tartar
2 tablespoons melted unsalted butter

Equipment
1 large mixing bowl
2 medium mixing bowls
1 electric mixer, handheld or stand, with all speeds working 
1 balloon whisk
1 rubber spatula
 cup dry measure
1 teaspoon measure
 teaspoon measure
9" round springform pan with 3" high sides
Aluminum foil to wrap the outside of the pan
About 2 teaspoons of softened butter, enough to grease the inside of the pan

Directions


1. Wrap the outside of the 9" round springform pan in foil and grease the inside with softened butter.  Preheat the oven to 350°F.

2. In the medium bowl, whisk together the cake flour, baking powder and salt.  Set aside.


3. In the other medium bowl, beat the egg yolks and 2 tablespoons of the sugar on medium speed until pale yellow and thick, to the point of forming ribbons when you lift the beater.  Reduce the speed to low and beat in the vanilla and almond extracts.

4. Wash the beaters very thoroughly.  In the large bowl, beat the egg whites and cream of tartar on medium speed until thick and frothy.  Slowly add the rest of the sugar while the mixer is going.  Increase the speed to high and beat until the meringue forms stiff, glossy peaks.

5. Lightly fold the flour mixture into the egg yolks, until there are no streaks of flour remaining.  Stir in the melted butter.

6. Briskly fold about a third of the egg whites into the egg yolks and flour to lighten the mixture.  Then carefully fold it into the rest of the egg whites, trying not to deflate the egg whites too much.  

7. Spread the batter in the bottom of the pan.  Bake the cake for about 10-12 minutes.  It bakes very quickly, so be careful not to let it brown.  Remove the cake when it is a light golden color.

Cheesecake Batter

Ingredients
10 ounces frozen raspberries, unsweetened, thawed and drained
5 tablespoons cornstarch
8 ounces white chocolate, chopped
pounds full-fat cream cheese (3 8-oz packages), room temperature
1 cups sugar
1 tablespoon vanilla extract
2 extra-large eggs
cup heavy whipping cream
About 6 ounces fresh raspberries for garnish
White chocolate curls for garnish

Equipment
1 food processor if available, otherwise a fork and a small bowl
1 strainer for raspberry puree
1 double boiler, improvised double boiler or a small bowl and microwave 
1 rubber spatula
1 large bowl
1 electric mixer WITH WORKING LOW SPEED
1 small teaspoon for dropping raspberry puree into cheesecake batter
1 small knife for swirling puree
1 large pan, at least 13" in diameter with 3" high sides if you can get it (for water bath)

Directions 

1. Process the 10 ounces of raspberries, or mash with a fork.  Strain out the seeds, then combine with 1 tablespoon of cornstarch.

Oops.  The seeds.

2. Melt the white chocolate in the double boiler (or alternative), stirring constantly if you can and allow to cool to room temperature.

Stir to make the lumps go away.

3. In the large bowl, beat at low speed 1 package (8 oz.) of the cream cheese with the sugar until smooth and creamy.  No lumps!  Beat in the vanilla, then the rest of the cream cheese one block at a time.  Beat in the eggs, making sure one is fully incorporated before adding the other.  You will likely scrape the bowl down several times.

4. Stir in the melted white chocolate, then the heavy whipping cream.  Spend a few minutes using the rubber spatula to admire the silky batter.  Preheat the oven to 350°F. 

It's a lovely mixture :) Now go turn the oven back on.   

5. Place the 9" pan with crust inside in the roasting pan.  Add water to the pan outside of the 9" pan until it comes about halfway up the sides.  You want to be baking the cheesecake in a sauna of moist heat to keep the cheesecake cooking evenly.

6. Pour about half of the lovely cheesecake batter into the 9" pan.  Carefully spoon about half the raspberry puree on top of the batter, pushing the puree gently into the cake leaving plenty of white spots in the batter.  Carefully and evenly spoon the rest of the cheesecake batter on top of the raspberry puree, then again spoon the rest of the raspberry puree on top.  Look at the cheesecake and decide approximately where your swirls will go.  Using a small knife, draw deep figure 8s in the batter until the top of the cake is marbled.  Do not swirl too much and turn the cake pink.  

Swirl, not too much...  Try to avoid having the raspberry touch the pan, since it will stick.

7. Bake the cake for about 1 hour and 15 minutes.  It will be done when the top is golden with light brown edges.  The center will just barely wiggle.  Watch the cheesecake carefully!  Once the cake is deemed to be done, take it out of the oven and let it sit for 2 hours.  DO NOT DISTURB!  Moving the cake or allowing it to sit in a draft might make it crack or fall.  Allow the cake to come to room temperature before removing the springform sides.  Once it has done so, wrap it tightly in plastic wrap and refrigerate until serving.  Cheesecakes freeze well and are delicious frozen, but do take care to slice before you freeze.  They become rock-hard until refrigerated back into soft and creamy compliance.  Cheesecakes can be served cool, fresh out of the fridge or eaten with your hands straight from the freezer.  Enjoy!  :)


Mmmm... Cheesecake....

Monday, August 15, 2011

Nothing, Nothing at All... Rice Pudding

That's interesting.  I keep finding that I relate to other bloggers, particularly those who write of more than only food.  My latest discovery in the world of food blogging is 17 and Baking (I know, I'm late, she started more than 2 years ago), and her posts contain amazing insight.  One that I read spoke about the lack of motivation and boredom that accompanied her vacation.  I also have been struck with a strange lack of motivation.  My summer was full of potential, a full 6 weeks (summer classes for the first half, alas) in which to catch up and get ahead.  Of course, this is never quite accomplished due to the sheer volume of ambition.  I sometimes feel like I've lost a great deal of my inspiration, that my get-up-and-go has get up and gone (I can't take credit for that clever phrase, but I don't remember where I read it).  That I have accomplished nothing, and am not accomplishing anything, and if I continue this path of sloth, I will accomplish nothing.

The difference is that I am never bored, due in part to my eclectic nature and (probably in a greater) part to my constant procrastination.  I love to bake.  I like my classes that I am trying to get a head start in, with the exception of differential calculus.  I really ought to do more work for robotics.  I like to run.  I like to knit, and I have a half-finished pair of gloves I am making for a wonderful friend.  But I haven't really done a lot of these, with the exception of make food.  I sometimes fear that anything I pursue too seriously will become like my reading.  I will admit right here.  

I have a reading addiction.  

It started when I was about 5, having just moved to the United States from Hong Kong.  I am Chinese.  I understand Cantonese just fine.  I even speak it reasonably, enough to get by in daily life.  But I cannot read.  In my first language, I am illiterate, just capable of reading and writing my own name and about a kindergarten level.  This is in part due to my family moving to the States and in part to my choice of gymnastics over Chinese school, both on Friday nights.  When I began to learn English, some family friends had me read aloud from a book, called Draw Me a Star by Eric Carle.  I still think of that book very fondly and we are still in touch with those friends.  But to my detriment, I discovered that reading English was easy.  Incredibly simple, compared to the thousands upon thousands of Chinese characters required to read the newspaper or any book.  And because it was easy, I began to do it more. 

I also found that it was incredibly easy to dive into the world of words and lose track of time.  From the first grade on, my mum found me library books every weekend and let me devour as much as I had time for.  I don't get motion sick, and would often be deep into or done with books by the time we had driven back from the library.  I quickly moved past beginner books, reading as fast as I could see the words, and dove into books more interesting and deemed higher level.  I was reading far above my grade level until they stopped counting grade levels.  Books are my escape and a reliable source of information.

But this pleasure came with a price.  In middle school I was usually reading in class after I finished my work, earning me the dislike of one 5th grade teacher.  In high school, I didn't really have time for this eternal head-in-a-book mentality and generally acted like an addict on withdrawal when faced with any new book (or any old favorite-I can reread until a book falls apart).  Books were my drug.  I can't really rest until I've finished a book.  I am irritable when someone interrupts my reading.  When I finish a book, I often immediately look for another so I can procrastinate some more and just lose myself.  When Harry Potter and the Deathly Hallows came out,  I told my parents I was not hungry for dinner, locked the door and read from 8 that night to 3 in the morning.  

This recipe from 17 and Baking pulled me from my reading coma-induced sloth and kick-started my zest for life again.  After finding those wonderful vanilla beans again, this recipe caught my eye as the perfect vehicle to showcase my flavor of the week.  I was reminded that I don't appreciate things (like these beautiful beans) enough.  Right now, though, I appreciate the comfort of this rice pudding.  I never had it growing up, because my parents didn't buy it.  I do have a love of puddings, custards and jelly foods.  This one was perfect, with the addition of slightly crunchy vanilla bean seeds.  I didn't taste the jasmine tea, but I had an interesting incident where I accidentally left the stove for a minute while the milk was boiling.  The pot has a spout and I had left the lid turned so that steam could escape through said spout.  As the milk boiled over, it shot out of the spout in a stream and I was stunned for a moment before lifting the lid to relieve the pressure in attempt to save the jasmine milk.  Had I foresight, I would have taken a picture, but alas, the moment passed.  In any case, I didn't want to make more of a mess than I already had.

Vanilla Bean Jasmine Rice Pudding from 17 and Baking
½ Recipe, makes about 6 small servings

Ingredients
¾ cup water
¼ cup + 2 tablespoons short grain rice (I used a Chinese milled rice)
Somewhat less than ¼ teaspoon salt
1½ cups 1% milk (yep, still have no whole milk)
1 bag jasmine green tea (I suggest using 2, since I didn't taste any jasmine)
½ cup heavy cream
 ¼ cup sugar
½ vanilla bean, split lengthwise

Equipment
2 small pots, 1 for rice and 1 for jasmine milk
1 wooden spoon
¼ teaspoon measure
1 tablespoon measure
¼ cup dry measure
2-cup liquid measure

Directions

1. In one pot, combine the rice, water and salt.  Bring to a boil, then turn down the fire and simmer until all of the water is absorbed.  Do not stir the rice-it won't cook properly. 

2. In the other pot, bring the milk to a boil with the jasmine tea bag(s).  Turn the fire off and leave to steep until the rice is done, about 10 minutes.  Unlike the name of this blog, try not to set the tea bags or the paper tags on fire.   

3. Scrape the vanilla bean seeds into the cooked rice.  Add the whole vanilla bean, cream, sugar and jasmine milk.  Cook uncovered, stirring occasionally until all the liquid is absorbed and the pudding is creamy, about 20-30 minutes.

4. Scoop into bowls or simply cool as it is.  Enjoy!


Delicious, comforting food, eaten in soft daylight...


Sunday, August 14, 2011

Reviving the Passion - Sour Cream Chocolate Cake

I don't know quite what drove me to do it.  One moment I was reading food blogs, another I was tearing maniacally through the dusty stored belongings under my bed, searching furiously.  Usually such searches bring such nostalgia that I stumble my way down memory lane and am instantly lost in the past.  Today, though, today I kept my head and kept searching.  The object of my desire?  Three vanilla beans that my best friend gave me for a birthday present.  

Why were they under my bed?  Why didn't I use them when they were a little fresher?  They're fine as far as I can tell-vanilla beans stay fresh for a long time and they've been in the same beautiful glass container since she first gave them to me.  Why did I save them?  I don't know.  All I know is that beginning today, I vow to give as much away as possible.  I will start with what I bake.

At school, what I make is mostly sustenance food.  I make biscuits and cornbread, banana bread and scones using milk instead of cream because it's quick, easy and cheap.  And I can live on it all weekend.  I am lazy when I don't have classes.  I don't need to venture off my little plastic chair in front of my desk and find cooked, savory food from the campus food stores.  I don't even have to leave my building if I have stocked enough food for the weekend. 

But what kind of life is that?  I want to make something worth savoring, something sweet and delicious and not too much.  Too many people are on diets and refuse my sweet items.  It hurts when they do.  It shouldn't, it's nothing personal, but I usually over-analyze and take things too personally, anyway.  I want others to enjoy food as much as I do.  I want to find small cookie cutters and small muffin tins.  I want to make small items that are easily sampled and savored and make enough of them that one isn't sated immediately.  Most of all, I want to make enough that I can give one to everyone, not just the people within my vicinity or lucky (I hope, I mean, if they hate my food...) enough to pass by.  I first read the book Pure Chocolate by Fran Bigelow a couple summers back.  She mentions sweets that are pure, intense, beautiful.  My dad said something about presentation when I made those hot chocolates.  I will take care in every step of my baking to ensure that my desserts are beautiful as well as delicious.  Although this blog was intended to be a chronicle of making food when there are few bowls, no mixer and limited space available, I want that food to be good.  You don't have to eat a lot of it.  You can enjoy a little, and be satisfied but not overly full.  With a little creativity, I think that can happen.  

It was very clear to me one of the first times that anyone really complimented my food.  My wonderful roommate last year, and one of my dearest friends, loves chocolate.  She ate a simple cupcake that I had made after the Organic Chemistry final exam.  Note:  I didn't take the Orgo exam.  But most of my friends did.  I had swapped out for Solid Mechanics instead, at a delightful 8:20am.  But the Orgo exam.  The final had been brutal, the last couple of weeks a miserable grind.  But when she bit into the marbled vanilla and chocolate cupcake, her face lit up and she could not stop raving.  I believe she said the words "Oh, my God" from when she first tasted the cupcake until late that night with an occasional scattered phrase in between.  Another one of my very good friends even videotaped that reaction.  The ingredients were not top-notch and I had done a great deal of batter-shuffling to make the cupcakes happen.  But the cupcake was fresh out of the oven, made with love.  I think I made over 75 cupcakes that day, just working off the stress from the semester.  But that one was my very favorite cupcake of them all.

That day I also introduced someone to green tea baked goods, the same friend who taped my chocolate-loving roommate.  She had one of those same cupcakes, but green tea instead of marbled.  And I will never forget the incredible look in his eyes when my boyfriend told me that the chocolate chip cookies I mailed him for his birthday sang for him.  This is why I bake.  I love food and am probably obsessed with it, but I want to share the incredible pleasure of a beautiful and delicious pastry.  The metaphorical icing on the cake is that this particular recipe is easy to make.  I've messed it up, mixed it around, and it still turned out edible.  Heck, one vanilla version of the cake traveled halfway to Michigan from Long Island New York by car and it was still edible.  And that one was for a professor! 0.o  It's always moist and light, delicious and satisfying even when I alter this recipe, usually just reducing the sugar.  I love this cake recipe!

Sour Cream Chocolate Cake Layers barely tweaked from The Cake Book by Tish Boyle
Makes 2 9" round cake layers, or about 26 cupcakes 

Ingredients
2⅔ cups all-purpose flour
2 cups sugar 
 ½ cup cocoa powder
1½ teaspoons baking soda
½ teaspoon salt
3 large eggs, room temperature   
 ⅔ cup sour cream, room temperature
1 tablespoon vanilla extract
10 tablespoons (1¼ sticks) unsalted butter, melted and cooled to room temperature
⅔ cup oil (safflower or corn oil, but I use an inexpensive olive oil we buy in bulk)
1¼ cups cold water 

Equipment
2 medium bowls
1 large bowl
1 balloon whisk
2-cup liquid measure
1 cup dry measure
½ cup dry measure
⅓ cup dry measure 
1 teaspoon measure
 ½ teaspoon measure
¼ teaspoon measure
At least 1 (preferably 2) cupcake pan(s) 
Cupcake liners! Or extra butter and flour
     Or, if you desire to make 2 cakes instead, 
     2 9" round cake pans
     Extra butter for greasing
     Extra flour for dusting
     Parchment paper for lining the bottoms of the pans

Directions

1. Prepare your cake or cupcake pans.  If using 2 9" cake pans, grease the bottoms and sides of the pans and line with parchment paper, greasing the paper.  Dust flour over the sides of the pans and parchment.  If using the cupcake pans, simply line with paper cupcake liners.  

2. In one medium bowl, sift together the dry ingredients (flour, sugar, cocoa, baking soda and salt), then whisk to blend thoroughly.  Set aside.

3. In the other medium bowl, beat the eggs with the sour cream and vanilla.  Set aside.

4. In the large bowl, combine the butter, oil and water.  Preheat the oven to 350°F.

5. Add all the dry ingredients to the butter mixture and mix until blended.  Add the egg mixture and mix until blended, about another 2 minutes.  The batter should be a smooth, somewhat thick liquid batter.  

Thick consistency, like a soft pudding.
 
6. Divide the batter evenly between the 2 9" round cake pans or the cupcake pans.  Fill the cupcake liners a little more than ⅔ full.

Very useful to have a large spoon or small ladle to help distribute batter evenly.
 
7.  Bake the cakes for about 40-45 minutes, or the cupcakes for about 20 minutes.  A toothpick will come out clean when the cakes are done.  Cool the cakes or cupcakes on wire racks.  Please note that the tops are somewhat sticky until the cakes are completely cooled, so do any layer-stacking then.  Share and enjoy!

This whole natural lighting thing can get difficult with a digital point-and-shoot...

Postscript:  The metaphorical buttercream roses piped atop this cake is that this is the base layer for my dad's Black Forest Cake that he has asked for two years in a row. And both my parents are very truthful and sparing with praise.